> ## Documentation Index
> Fetch the complete documentation index at: https://docs.seosorted.ai/llms.txt
> Use this file to discover all available pages before exploring further.
# Webflow
> Publish articles into a Webflow CMS collection, with your own field names.
Webflow has no fixed blog schema — every site names its CMS fields differently. So this connector
has an extra step the others don't: after authorising, you tell us which collection to write to
and which of your fields hold the title and body.
We request `sites:read`, `cms:read` and `cms:write` — enough to list your sites and collections
and create items. We cannot edit your designs or publish your site.
## Before you start
* A Webflow site with a **CMS collection** for your posts (a blog collection created from any
Webflow template works).
* A Webflow account with access to that site's CMS.
* The collection needs at least a plain-text field for the title and a **Rich text** field for
the body.
## Step 1 — Authorise
**Project Settings → Integrations → Webflow → Connect**. Webflow asks which sites or Workspaces
to grant access to.
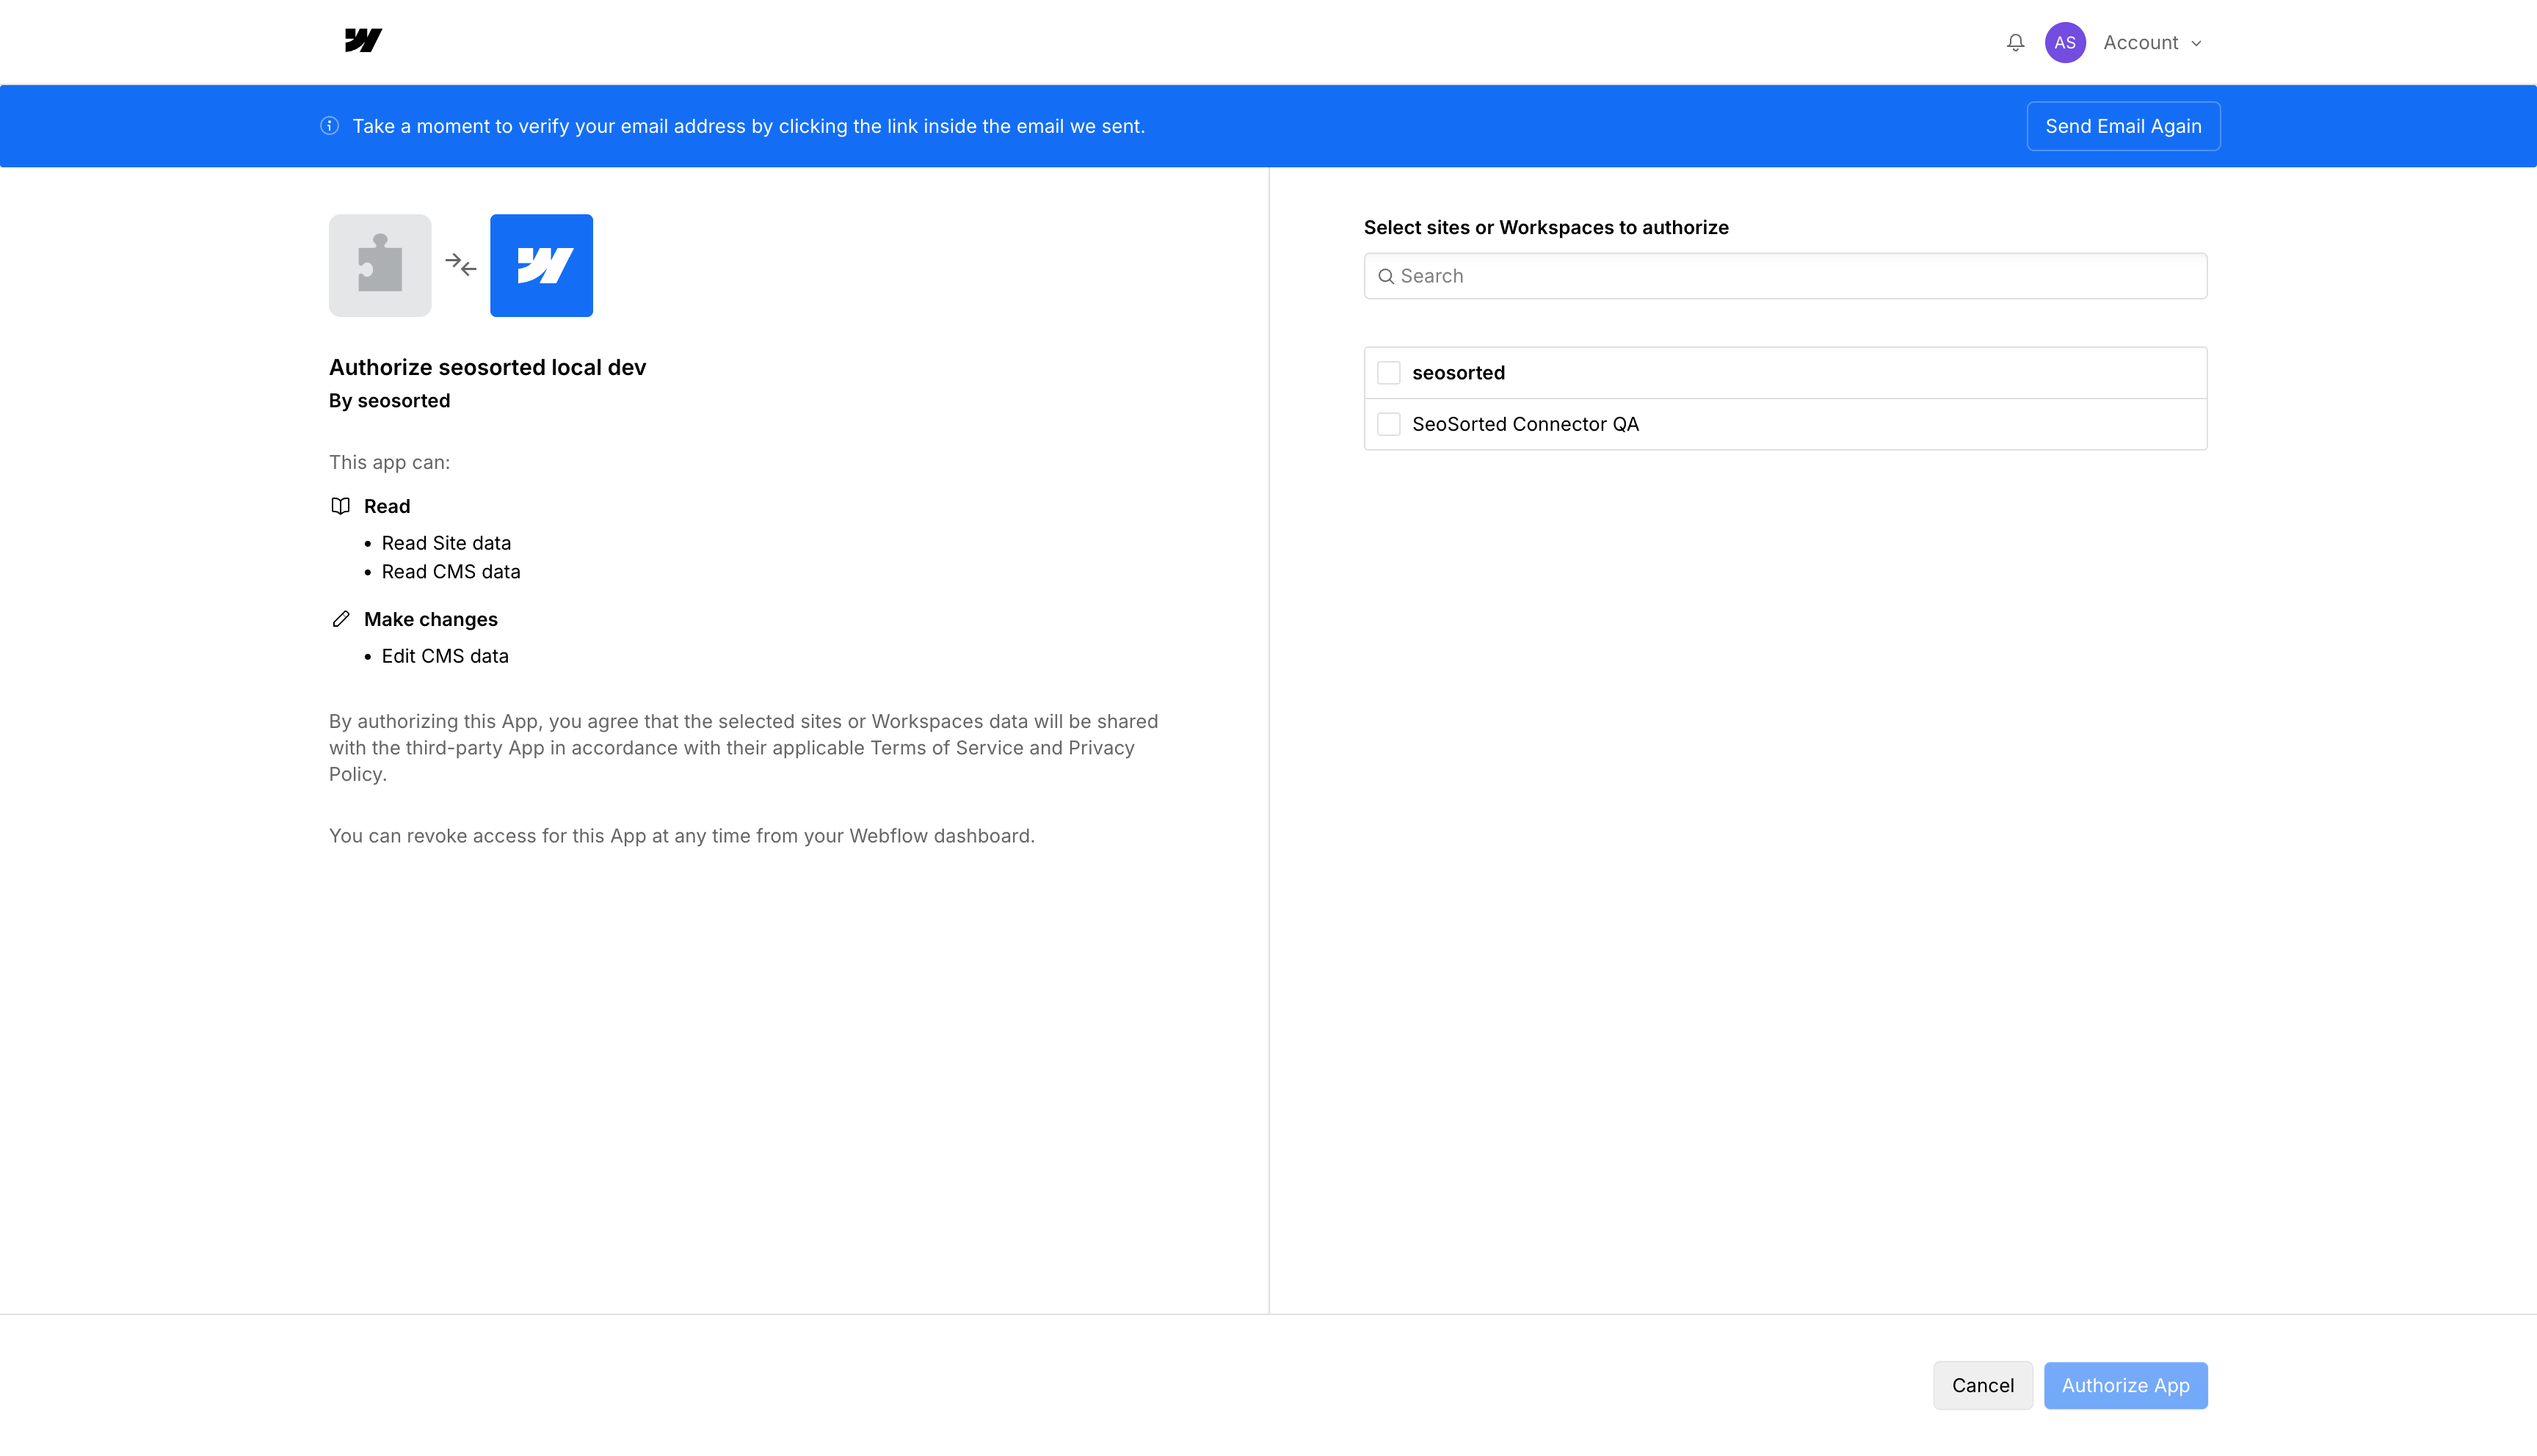 Tick the site, then **Authorize App**. You're returned to the Integrations tab.
Grant access to the specific site you publish from rather than the whole workspace — the
collection list stays short and you don't hand over sites we have no business touching.
## Step 2 — Choose a collection and map fields
The card shows **Setup required — pick a collection**. Click **Finish setup**.
The form asks for:
Which Webflow site to publish into. Sites you granted access to in Step 1 appear here.
The CMS collection that holds your posts — usually "Blog Posts" or "Posts".
Which Webflow field receives each part of the article. We read the collection schema and
pre-fill sensible guesses: the `name` field for the title, the first Rich text field for the
body.
Tick the site, then **Authorize App**. You're returned to the Integrations tab.
Grant access to the specific site you publish from rather than the whole workspace — the
collection list stays short and you don't hand over sites we have no business touching.
## Step 2 — Choose a collection and map fields
The card shows **Setup required — pick a collection**. Click **Finish setup**.
The form asks for:
Which Webflow site to publish into. Sites you granted access to in Step 1 appear here.
The CMS collection that holds your posts — usually "Blog Posts" or "Posts".
Which Webflow field receives each part of the article. We read the collection schema and
pre-fill sensible guesses: the `name` field for the title, the first Rich text field for the
body.
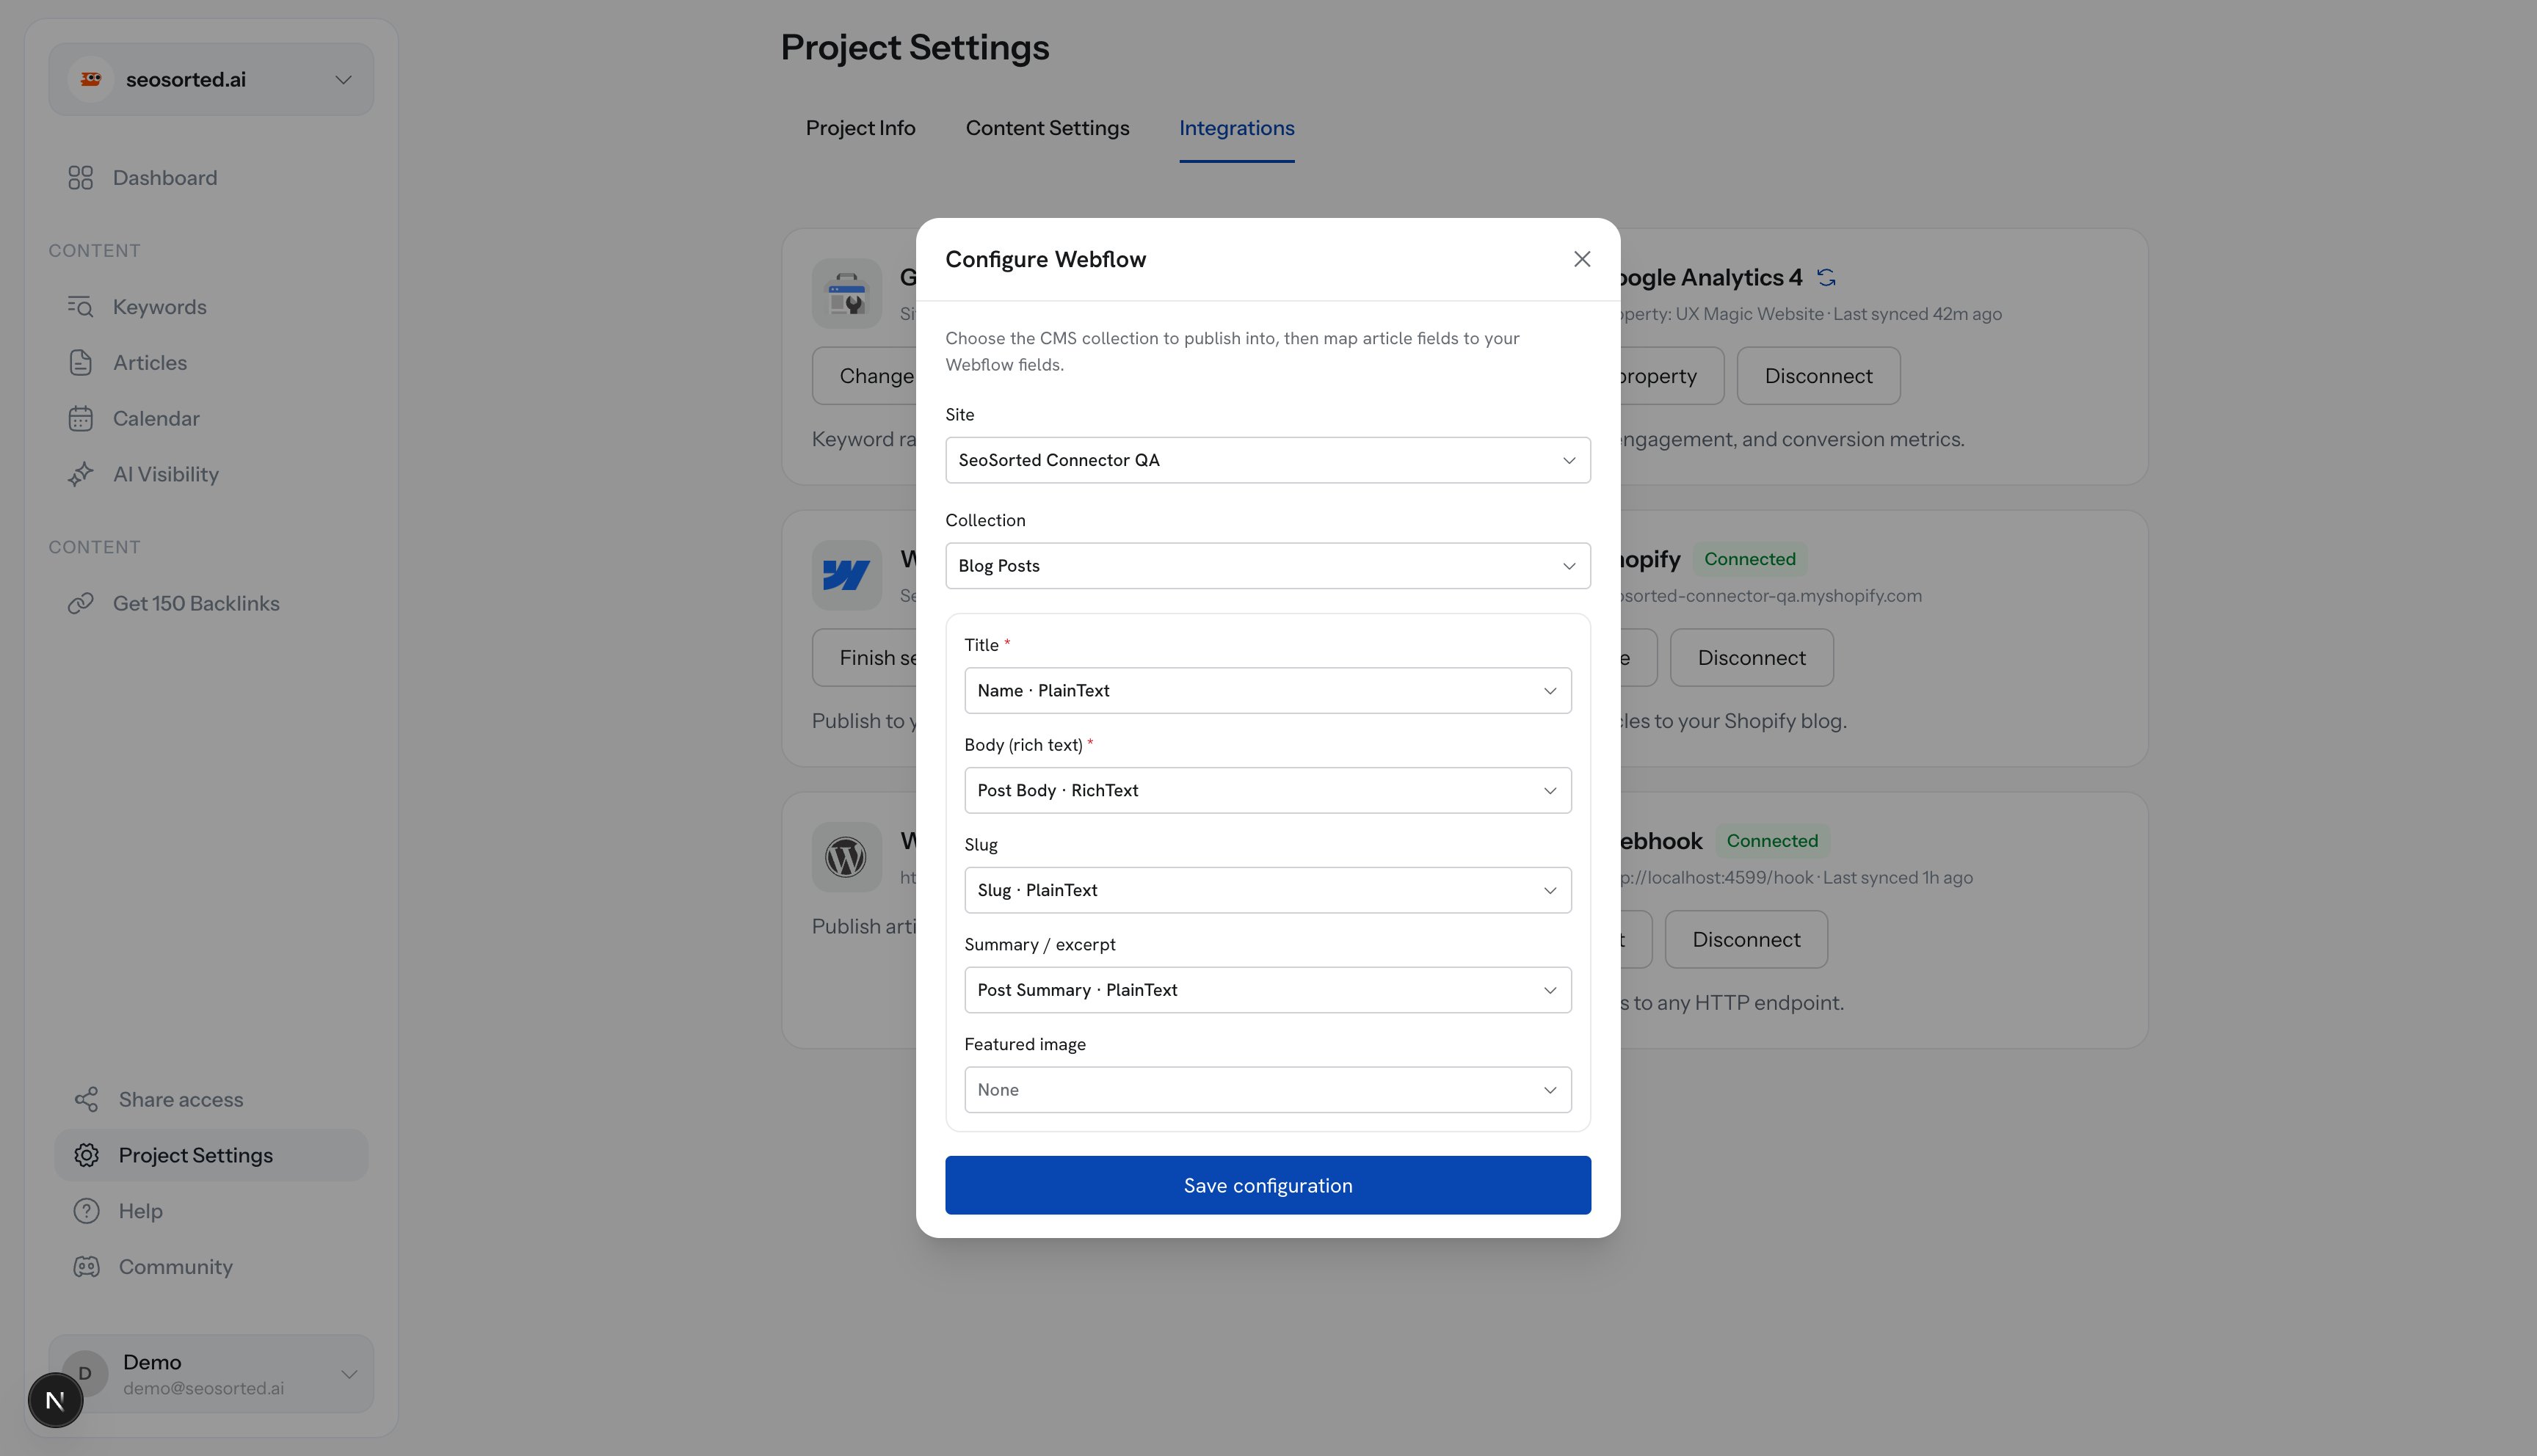 | SeoSorted field | Required | Webflow field type to map to |
| ----------------- | -------- | ---------------------------- |
| Title | Yes | Plain text (usually `Name`) |
| Body (rich text) | Yes | Rich text |
| Slug | No | Slug |
| Summary / excerpt | No | Plain text |
| Featured image | No | Image |
Click **Save configuration**. The card stops saying "Setup required" and the connector is ready.
Confirm the pre-filled mapping before saving. A collection with several Rich text fields (body,
author bio, disclaimer) may auto-map the body to the wrong one, and articles will publish into
the wrong place.
## Step 3 — Publish
Open an article, click **Publish**, choose **Webflow**, then **Publish now**. We create one
collection item with your mapped fields.
| SeoSorted field | Required | Webflow field type to map to |
| ----------------- | -------- | ---------------------------- |
| Title | Yes | Plain text (usually `Name`) |
| Body (rich text) | Yes | Rich text |
| Slug | No | Slug |
| Summary / excerpt | No | Plain text |
| Featured image | No | Image |
Click **Save configuration**. The card stops saying "Setup required" and the connector is ready.
Confirm the pre-filled mapping before saving. A collection with several Rich text fields (body,
author bio, disclaimer) may auto-map the body to the wrong one, and articles will publish into
the wrong place.
## Step 3 — Publish
Open an article, click **Publish**, choose **Webflow**, then **Publish now**. We create one
collection item with your mapped fields.
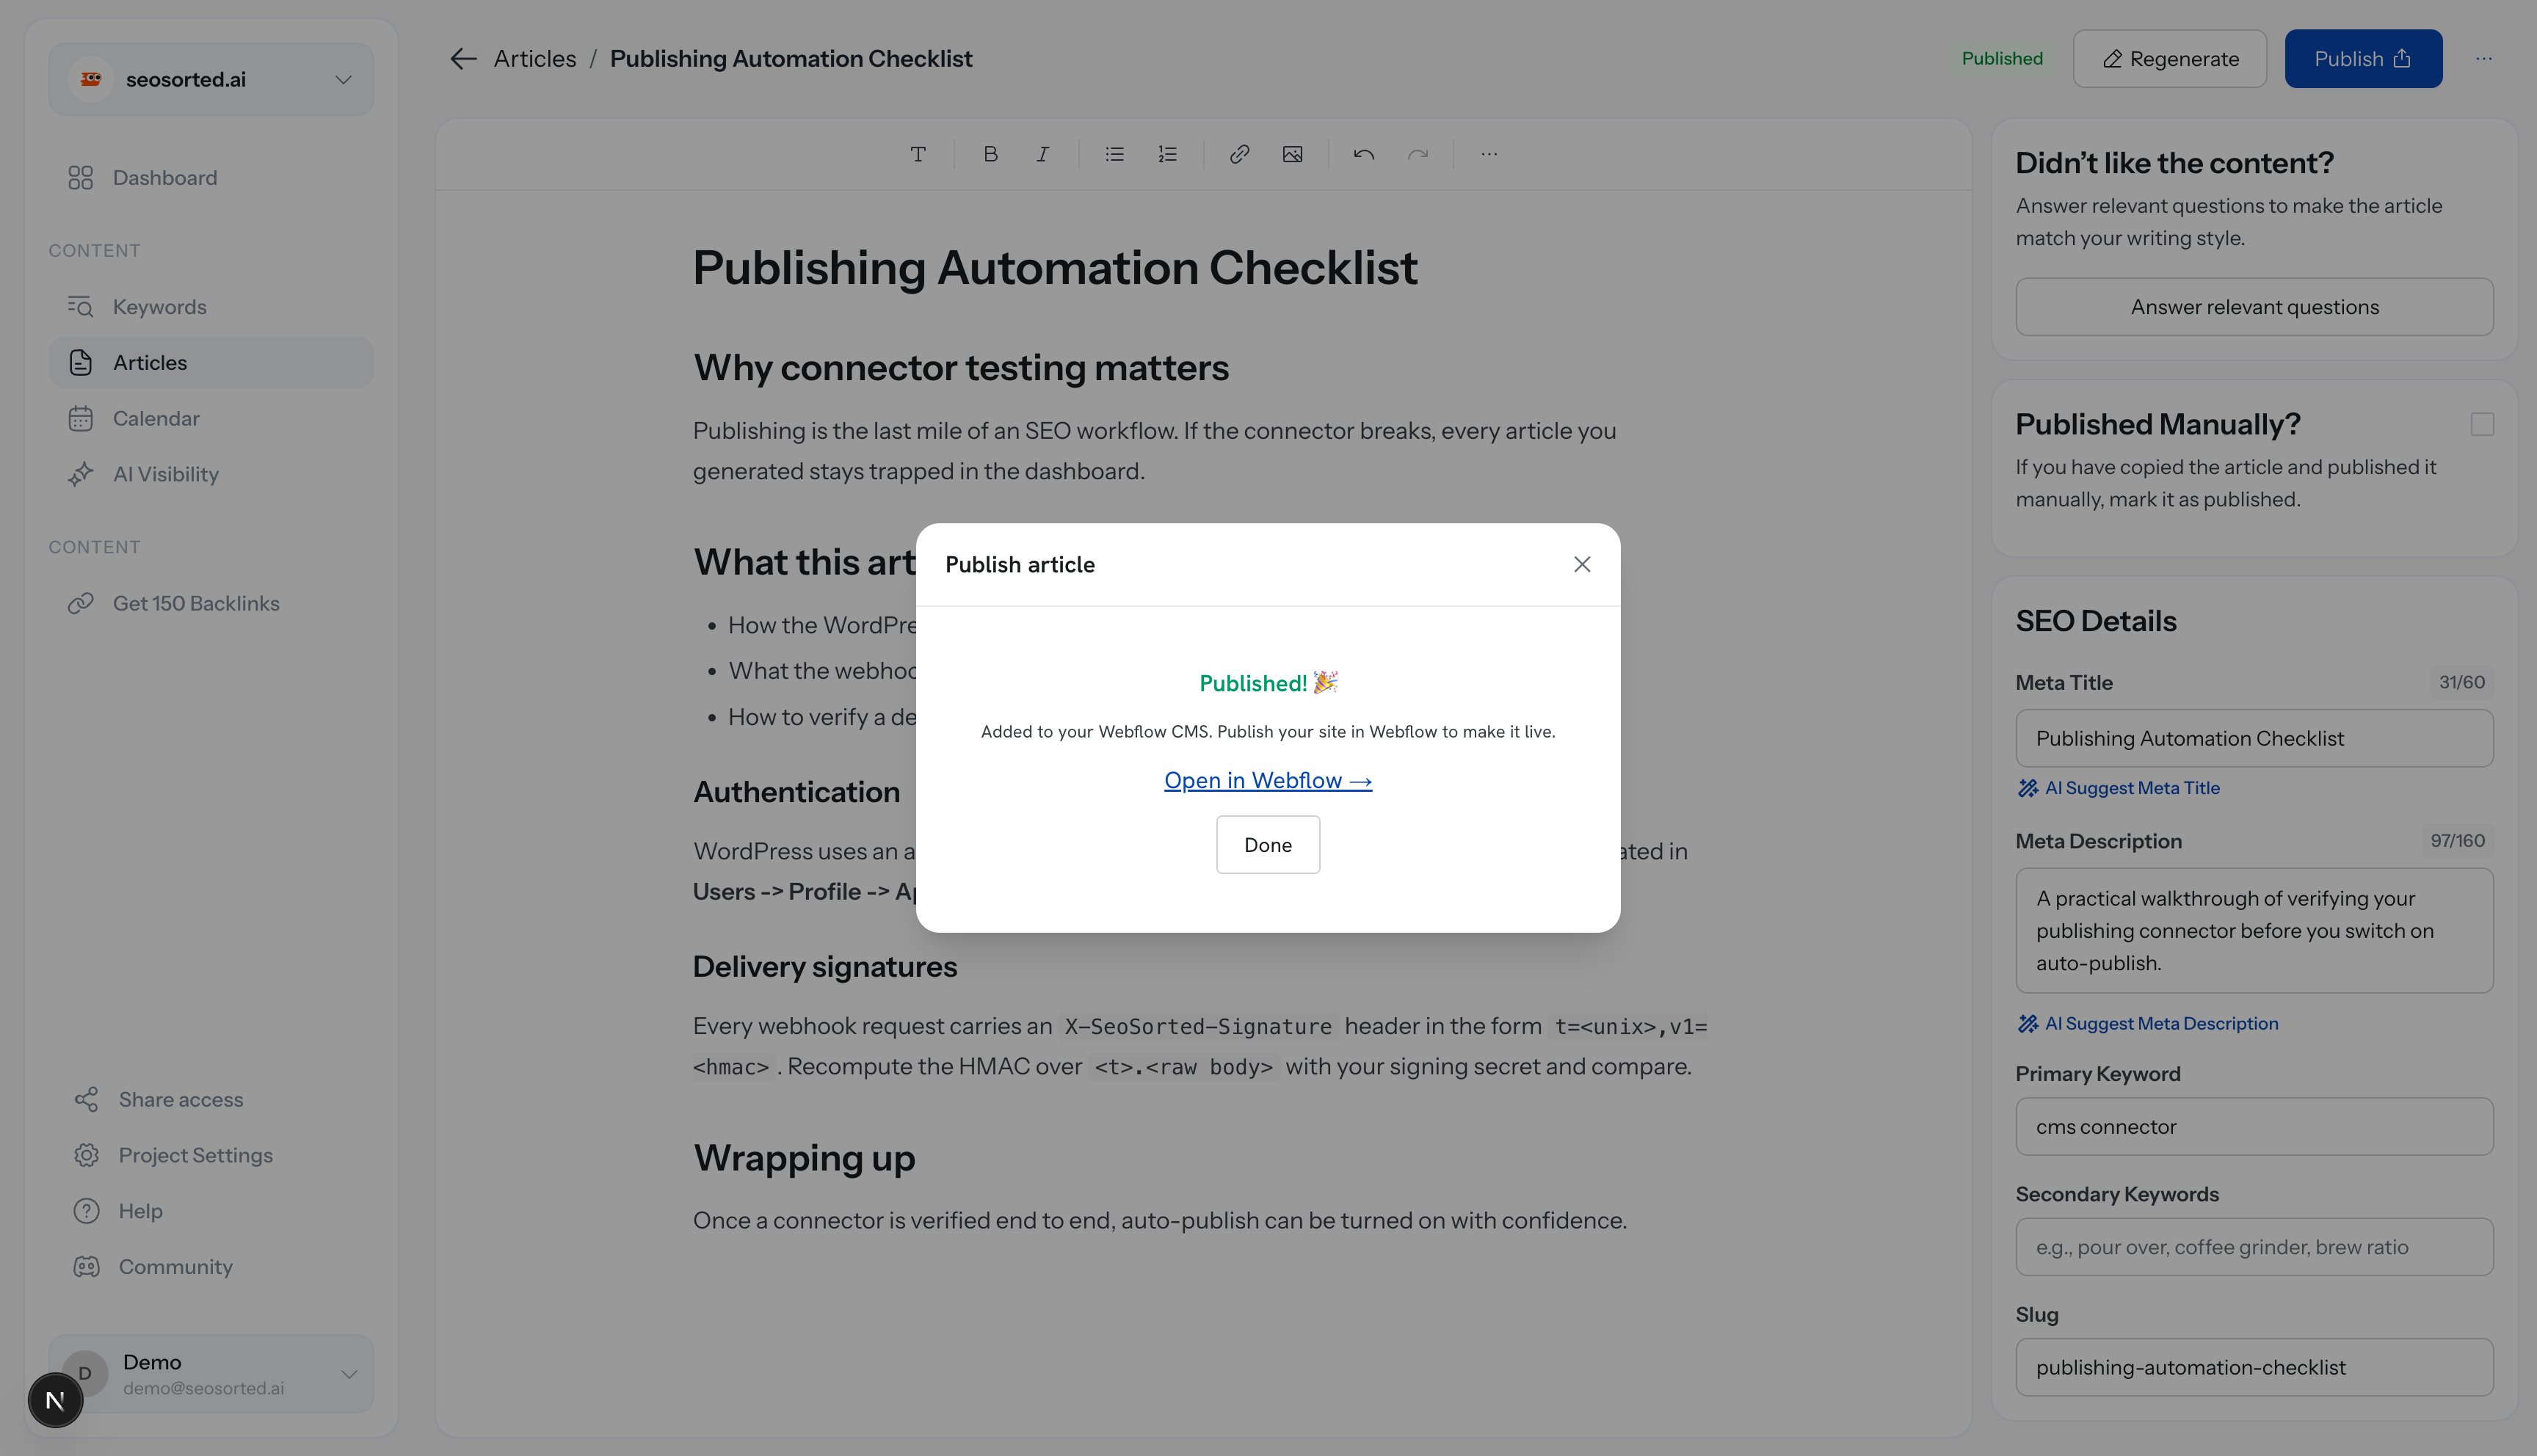 Items are created **live** where possible, so they appear on your published site right away if
your templates already render that collection.
If the site has **never been published**, Webflow refuses live items. We fall back to staging the
item instead: it lands in your CMS immediately and goes out with your next site publish. Either
way the publish succeeds.
## Common problems
The authorisation didn't include any site. Disconnect, connect again, and select a site on
Webflow's authorisation screen.
The collection and field mapping were never saved. Open **Project Settings → Integrations →
Webflow → Finish setup** and save the configuration.
The body was mapped to a plain-text field, which silently drops HTML. Map it to a **Rich
text** field.
Webflow only serves CMS content after a site publish. Publish the site in the Webflow
Designer, and confirm your templates actually render that collection.
Items are created **live** where possible, so they appear on your published site right away if
your templates already render that collection.
If the site has **never been published**, Webflow refuses live items. We fall back to staging the
item instead: it lands in your CMS immediately and goes out with your next site publish. Either
way the publish succeeds.
## Common problems
The authorisation didn't include any site. Disconnect, connect again, and select a site on
Webflow's authorisation screen.
The collection and field mapping were never saved. Open **Project Settings → Integrations →
Webflow → Finish setup** and save the configuration.
The body was mapped to a plain-text field, which silently drops HTML. Map it to a **Rich
text** field.
Webflow only serves CMS content after a site publish. Publish the site in the Webflow
Designer, and confirm your templates actually render that collection.